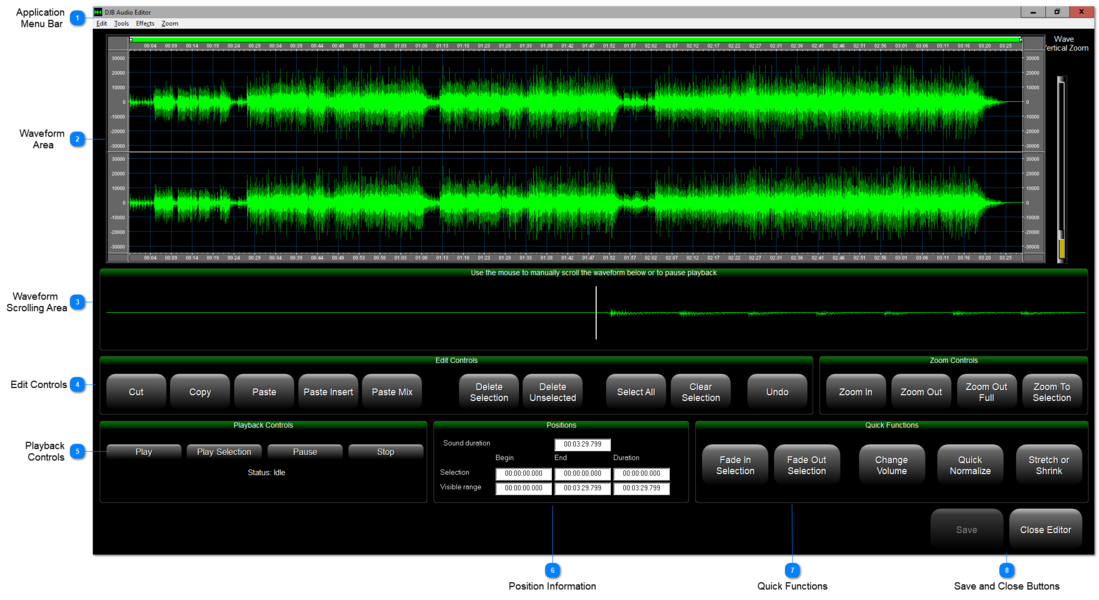
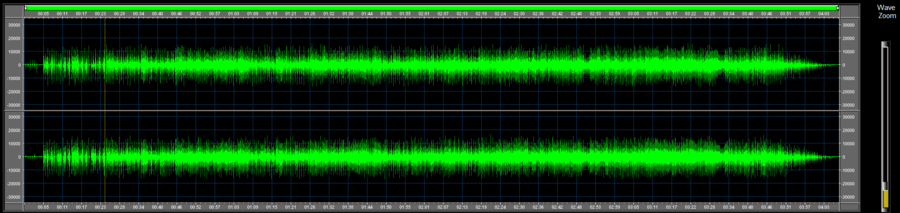
This area allows you to see the entire waveform, or a zoomed in portion of it.
The "Wave Vertical Zoom" slider on the far right makes the waveform taller or shorter to make the peaks and valleys easier to see. It does NOT change the volume.
The yellow bar indicates the current position of the playback transport (or cursor) in the waveform.
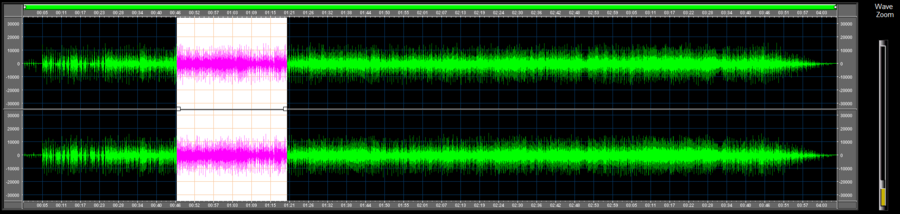
Once you have made a selection it will look like the picture below. Note the white squares allow you to drag to resize the current selection.
Information about the current position and the start, end, and length of the selection are found in the Position Info area.
"Sound Duration" shows the total length (HH:MM:SS.TTT) of the sound file.
"Selection" shows the start, end and total duration of the current selection.
"Visible Range" shows the start, end and total duration of the waveform area. In the picture above it is showing numbers for a file zoomed all the way out and with no selection made.
"Fade In Selection" adjusts the volume of the selected area from 0 to normal over the length of the selection.
"Fade Out Selection" adjusts the volume of the selected area from normal to 0 over the length of the selection.
"Change Volume" brings up a window allowing you to raise or lower the volume of the left, right, or both channels. 200% would be twice as loud. 50% would be half as loud.
"Quick Normalize" applies a normalization algorithm across the entire waveform.
"Stretch or Shrink" allows you to change the playback rate which affects both the pitch and the duration.
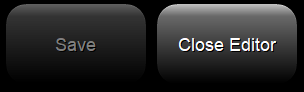
If you have made any changes you wish to apply, click the "Save" button. The button will be grayed out like the picture above if there are no changes to save.
When you are finished, click the "Close Editor" button to close the editor. If you have made changes but have not saved them, this will discard the changes.