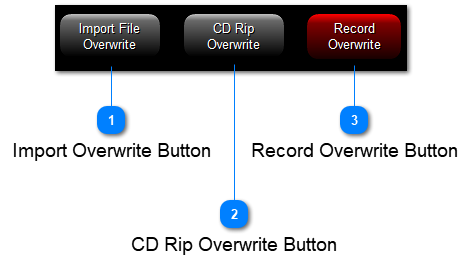
Import Overwrite ButtonThis button allows you to import an audio file to overwrite and replace an existing cut.
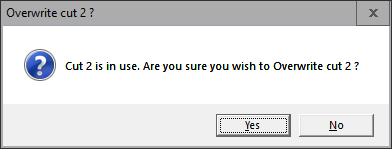
First select the cut you wish to replace in the main production window, then click the button.
This confirmation dialog will pop up:
|
|
 CD Rip Overwrite ButtonThis button allows you to Rip a CD Track to overwrite and replace an existing cut.
First select the cut you wish to replace in the main production window, then click the button.
This confirmation dialog will pop up:
|
|
 Record Overwrite ButtonThis button allows you to record an audio file to overwrite and replace an existing cut.
First select the cut you wish to replace in the main production window, then click the button.
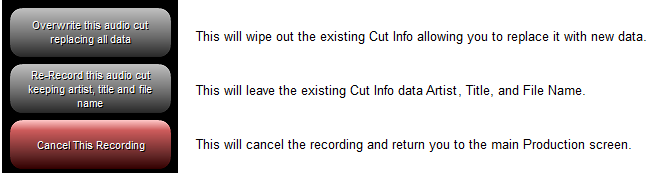
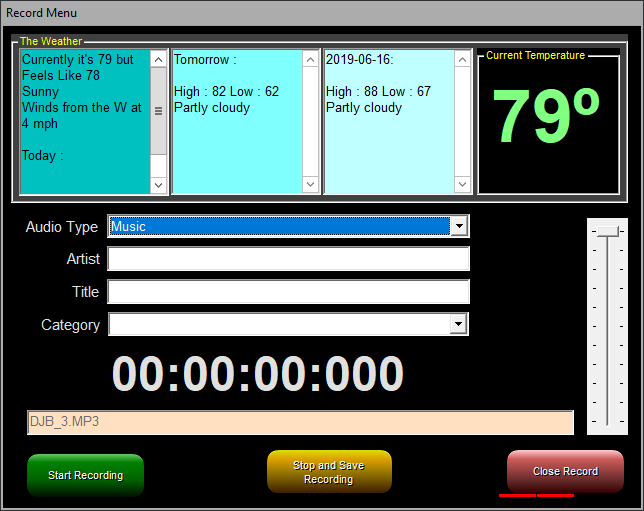
This dialog will pop up:
Once you select either of the 2 gray buttons, then the window below appears.
1. Set the Cut Info (Only if you selected the top gray button):
You can use the "Audio Type" drop box to select the audio type (music, commercial, etc.).
Fill in the Title and Artist you wish to have entered into the Database.
Use the "Category" drop box to select the category.
If you chose the second gray button, the info will already be populated.
2. You can preview the levels before you record and adjust them with the gray slider.
Once you are happy with the settings, click "Start Recording."
3. When the recording is finished click "Stop and Save Recording." If you wish to record again you can click "Start Recording"
4. Once you are happy with the recording, click "Close Record."
|
|