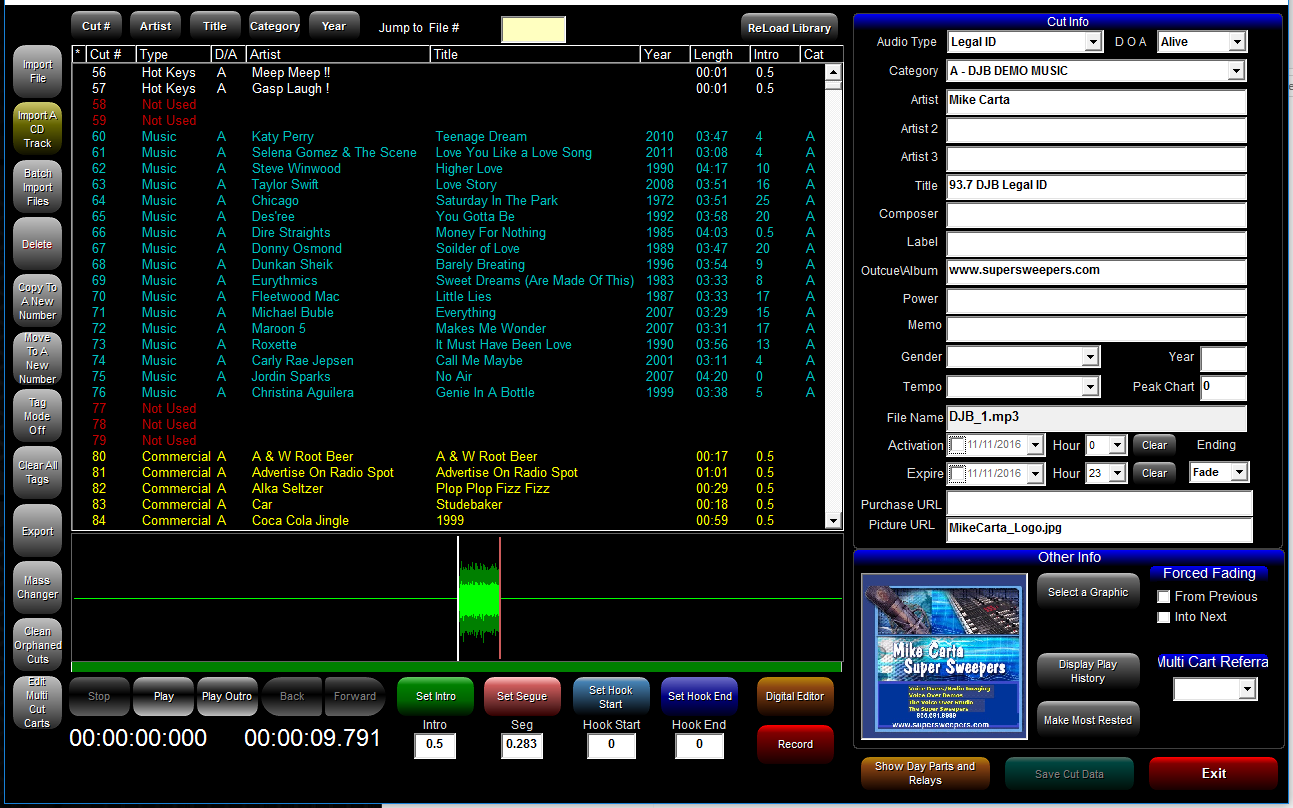
First order of business after you have created CATEGORIES in section {Audio Category Naming}, is to import audio and create a functional database.
Three buttons (as above) on the Production Database Window allow users to do this selected by your available audio cut sources.
Use the [Import CD Track] button to rip a cut off a CD-ROM. If you already have your audio cuts (music) rippped use the [Import File] or the [Batch Import Files] buttons.
For mode detail, see next section of this manual {Audio Cuts Importing} for step by step details on the []Importing Audio Buttons].
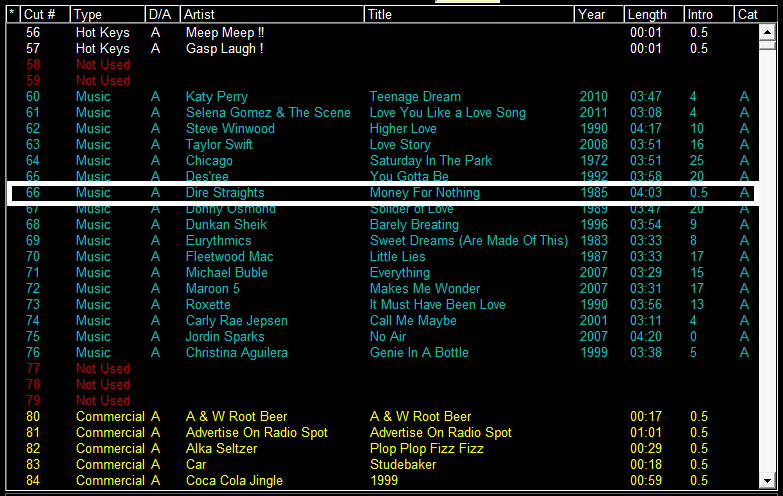
At the top of the audio cut database is a row of buttons that sort the dayabase on [Artist], [Title], [Category] and [Year] alternate action for A-Z and Z - A
Listen to the musical Intro to the audio cut and press [Set Intro] just before vocals start: This will mark the spot where OnAir talent can talk over the intro {Air Screen Countdown Timer] then jump out before timer hits [0] zero.... If you are importing music that already has the intro time embedded in the audio header your intro will automatically import.
Pressing [Play Outro] will start playing 15 seconds before the end of the audio cut so that the SEGUE mark can be placed at the end of audio cut. See next button.
Once you have pressed [PLAY OUTRO] use this button to mark where you want the marker to trigger the start of the next music cut. Here there are two options:
(1) If the song has a faded ending, place the SEGUE mark at a spot approx 2-3 seconds after the level starts to fade. Option (2) If the audio cut ends COLD (no fade), then place the marker at the end of the music.


 First order of business after you have created CATEGORIES in section {Audio Category Naming}, is to import audio and create a functional database.