DJBRadio DJB II Production window DJB-II Production Database Editor & Scheduler
|
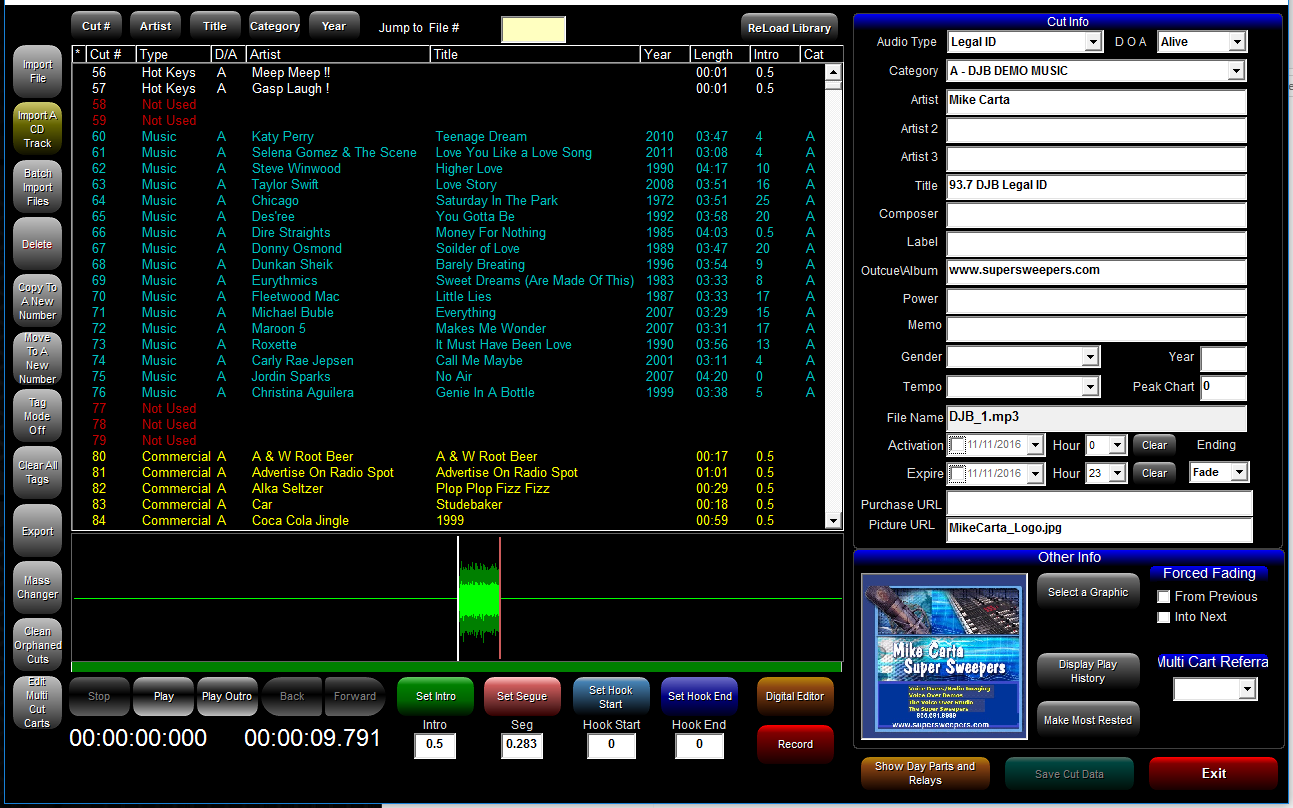
 Importing Audio Buttons Three buttons (as above) on the Production Database Window allow users to do this selected by your available audio cut sources.
Use the [Import CD Track] button to rip a cut off a CD-ROM. If you already have your audio cuts (music) rippped use the [Import File] or the [Batch Import Files] buttons.
For mode detail, see next section of this manual {Audio Cuts Importing} for step by step details on the []Importing Audio Buttons].
|
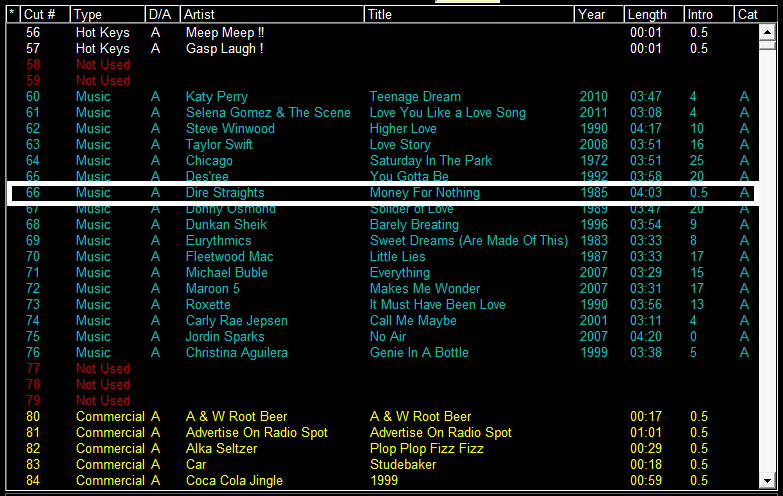
 Sort Order Audio DatabaseAt the top of the audio cut database is a row of buttons that sort the dayabase on [Artist], [Title], [Category] and [Year] alternate action for A-Z and Z - A
|
 Audio Cuts Database Window Audtion and Play Select an audio cut first, then proceed to the next [BUTTONS] below to learn about the audio play & mark audio contro
|
 Audio Database Controls - Play Set Marks
|
 Audio Play Button Select audio cut and press PLAY
|
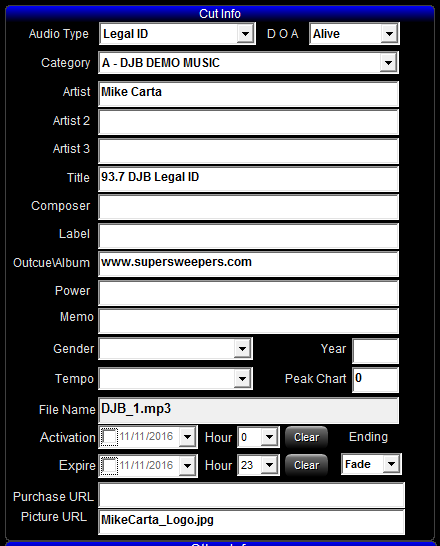
 Set Intro Time To Vocal Post Listen to the musical Intro to the audio cut and press [Set Intro] just before vocals start: This will mark the spot where OnAir talent can talk over the intro {Air Screen Countdown Timer] then jump out before timer hits [0] zero.... If you are importing music that already has the intro time embedded in the audio header your intro will automatically import.
|
 Stop Audio Play Pressing the STOP button will automatically stop the playing of the audio cut and return the PLAY to the beginning of the audio cut.
|
 Play Audio Cut Outro Pressing [Play Outro] will start playing 15 seconds before the end of the audio cut so that the SEGUE mark can be placed at the end of audio cut. See next button.
|
 Set Segue Marker at End of Cut Once you have pressed [PLAY OUTRO] use this button to mark where you want the marker to trigger the start of the next music cut. Here there are two options: (1) If the song has a faded ending, place the SEGUE mark at a spot approx 2-3 seconds after the level starts to fade. Option (2) If the audio cut ends COLD (no fade), then place the marker at the end of the music.
|
 Set Audio Cut Hook Marks
|
 Audio Cuts & Scheduler Database
|
 Client area
|
 Client area
|
 Client area
|
 Client area
|
 Client area
|
 Client area
|
 Edit field
|
 Drop down
|
 Edit field
|
 Drop down
|
 Client area
|
 Client area
|
 Client area
|
 Client area
|
 Client area
|
 Client area
|
 Client area
|
 Client area
|
 Client area
|
 Client area
|
 Client area
|
 Client area
|
 Client area
|
 Client area
|
 <TODO : Control Name><TODO>: Insert description text here...
|
 Client area
|
The online help was made with Dr.Explain
|


 First order of business after you have created CATEGORIES in section {Audio Category Naming}, is to import audio and create a functional database.