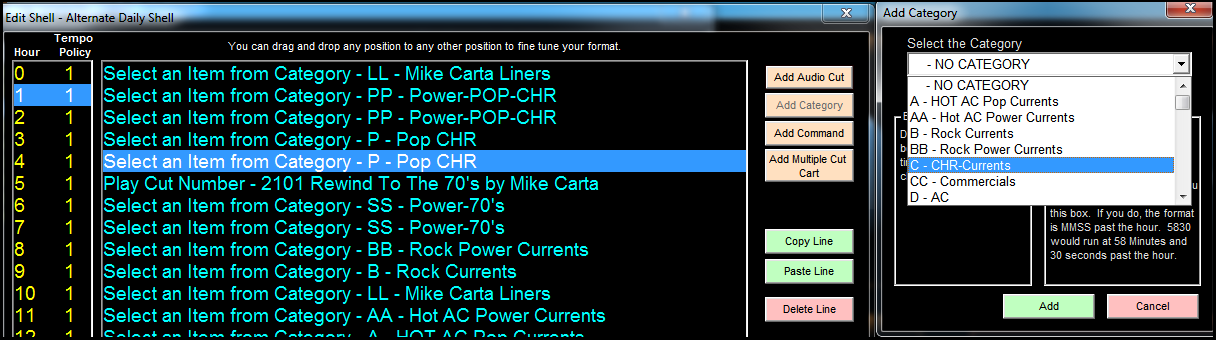
The Add Category Button opens the Add Category Window allowing the user to scroll and select the Category from which music is to be picked by the DJB Scheduler.
Once the Category is selected and ADD button is pressed, the Category will be insterted into the Log Shell
CANCEL button aborts the process and returns user to the Main Log Shell Editor window.
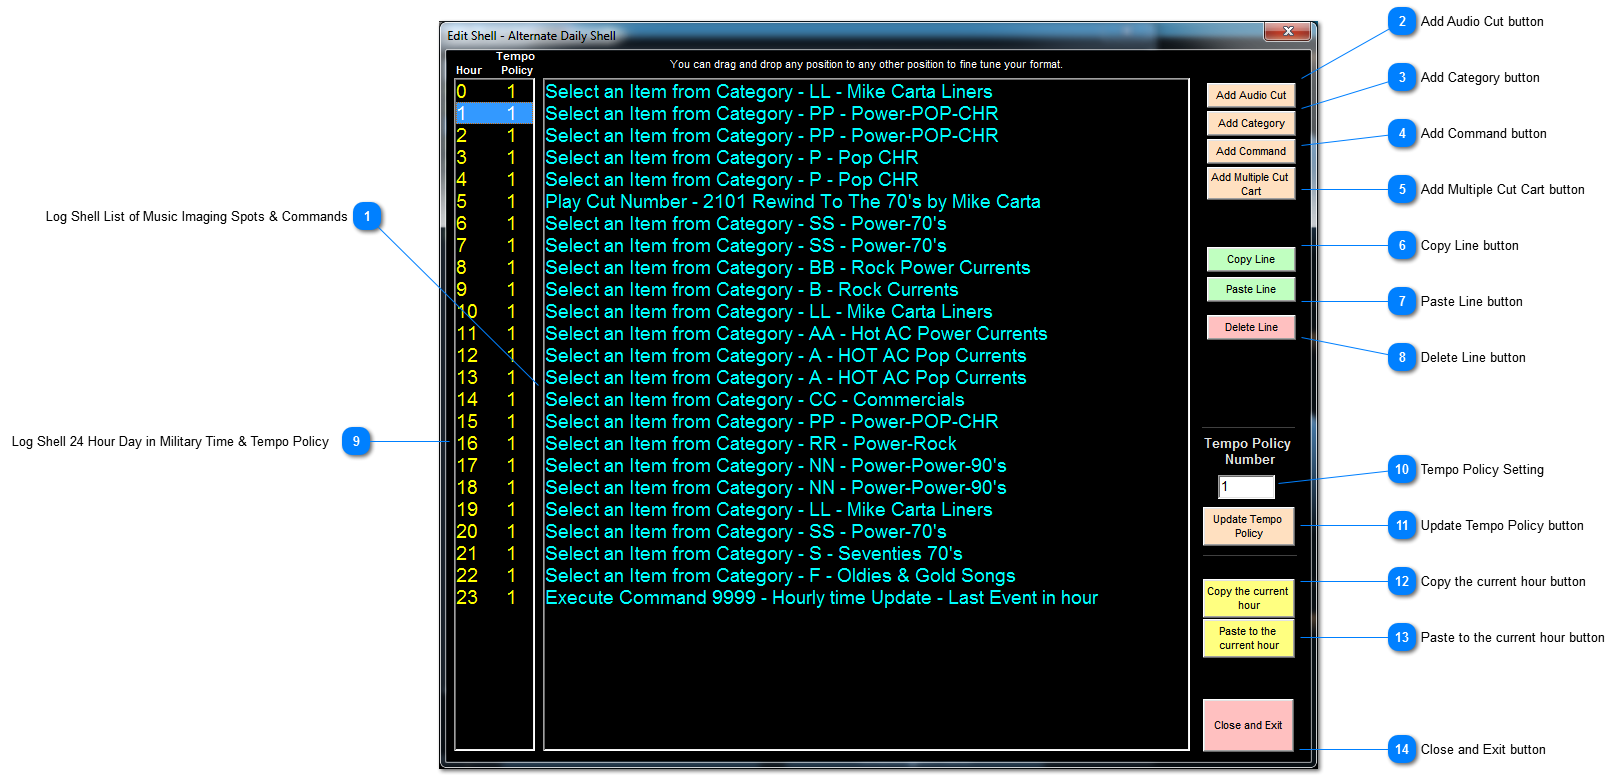
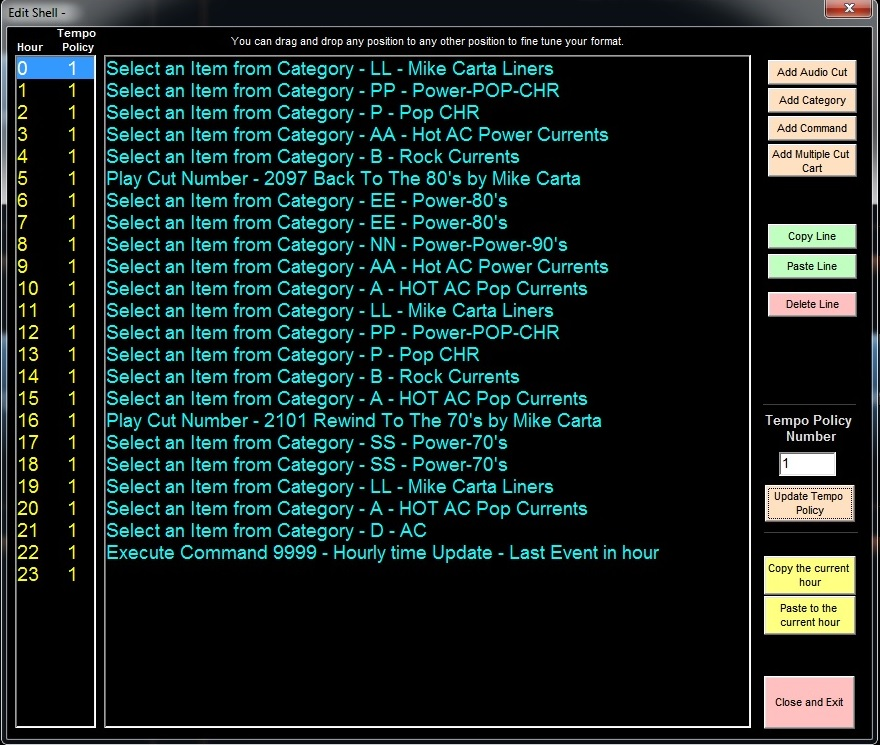
Note: In all cases Line Items can be Drag & Dropped and repositioned by the users once the Line Item is pasted into the Log Shell
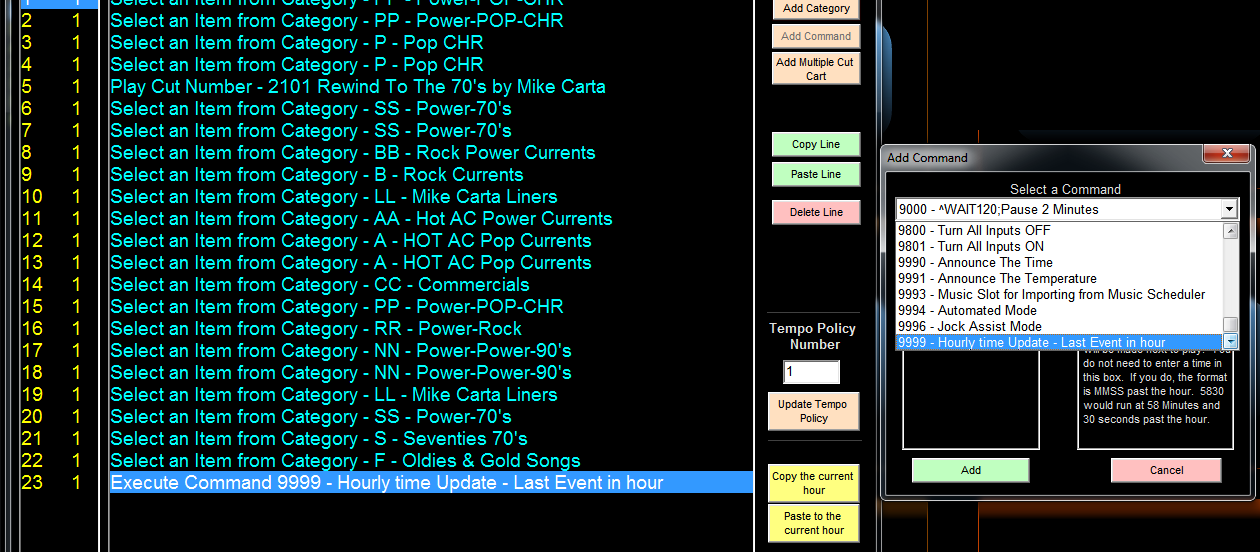
The Add Command Button opens the Add Command Window and allows the user to scroll and select the Command desired for the placement into the daily log shell.
In the illustration above, the Command 9999 is a soft synch placed at the end of the hour that allows the current item to finish playing before starting the next hour of the log
In the case of a Shift Change or to meet a Newscastt at the Top of the Hour, a hard synch would be selected so that the Line Item completes playing with a forced fade 3 seconds prior to the top of the hour.
All parameters of the Top of Hour fade are pre-selectable by the user.
Note: In all cases Line Items can be Drag & Dropped and repositioned by the users once the Line Item is pasted into the Log Shell
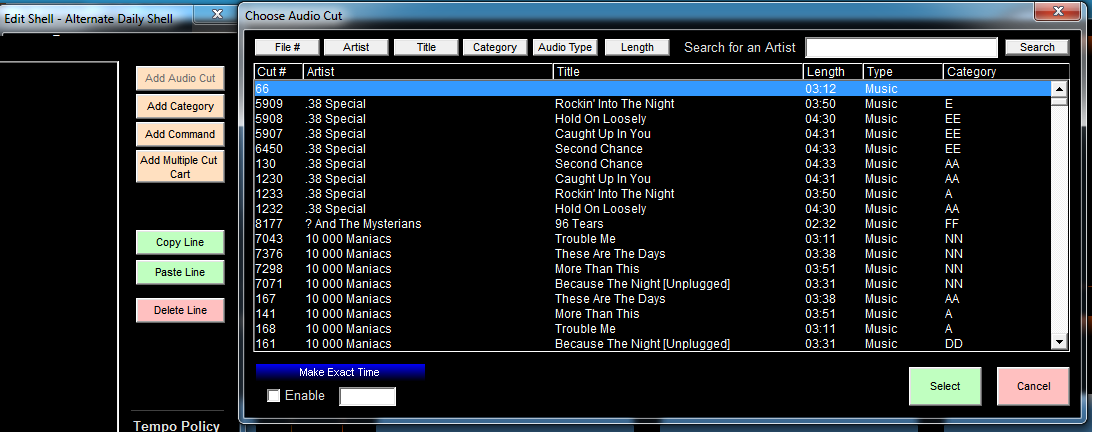
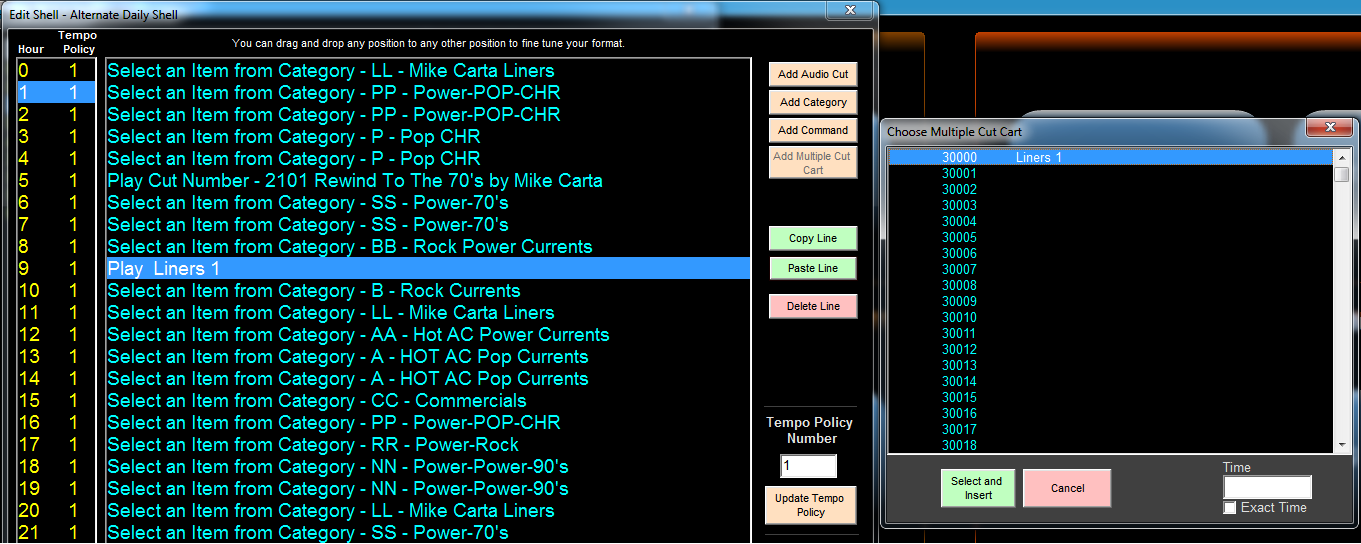
The Add Multiple Cut Cart Button(Cut Rotation Cart) opens the Choose Multiple Cut Cart Window that inserts a line item that will play the most rested Cut in the Multi-Cart.
The Multiple Cut Carts must be named before they can be pasted into the Log Shell however the Multi-Carts do not have to be produced until later. See Audio Production for Multiple Cut Carts.
Note: In all cases Line Items can be Drag & Dropped and repositioned by the users once the Line Item is pasted into the Log Shell
To set the Tempo Policy Number for the selected hour, enter the policy number in the Tempo Policy Number text box and click the Update Tempo Policy button.
Tempo Policy numbers range from 1 - 5, [1] (Slow Song) to [5] (Very Fast / Uptempo)
The Tempo Policy Editor is located on the [DJB Scheduler Menu], [Sub Menu Schedule Settings], [Edit Tempo Policy] Button