TODO: To change the header's content go to Dr.Explain menu Options : Project Settings : HTML (CHM) Export : Setup HTML Template and Layout
×
Menu
Index

Configure STLWare TX

Configure STLWare TX
 
DJB STLWare Main Screen
1

Audio Device

 
1. Audio Device
 
Use this drop down to select the audio capture device to use, audio coming into this device will be the Source for the TX
 
2

Audio Input

2. Audio Input
 
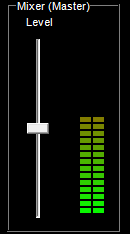
If your audio device supports multiple inputs they will be available for selection here, typically under Windows 7/8 enviroments this will always say Master Volume
3

Sample Rate

3. Sample Rate
 
Select the Sample Rate for the Encoding here
4

BitRate

4. BitRate
 
This option combined with the sample rate create your stream quality, the number shown is in bits per second.  Select the highest number that your internet connection can handle to get the best quality
5

Network Output Port

5. Network Output Port
 
This is the port used for the Client connection.  Depending on your network setup this port may need to be forwarded through your firewall to make a connection with the Client
6

Stream Information

6. Stream Information
 
Some Information can be injected into the Stream, fill out that information here
7

Line In Level

7. Line In Level
 
Shows the level of the audio coming into the audio and provides adjustsment via the slider bar
8

Stream Level

8. Stream Level
 
Shows the Level of the stream going out and provides adjustment via the slider bar
9

Connect/Disconnect

9. Connect/Disconnect
 
The Connect/Disconnect button is used to Enable or disable the TX stream
10

Connected Clients

10. Connected Clients
 
When the stream is enabled, you can see the number of connected clients and then view a list of the connected clients and their IP addresses
The online help was created with Dr.Explain