To properly display this page you need a browser with JavaScript support.
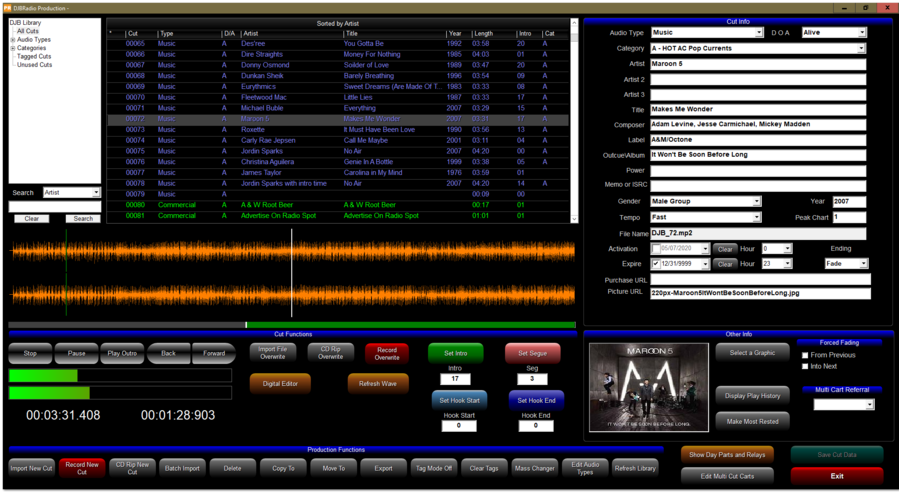
DJB Radio Production window
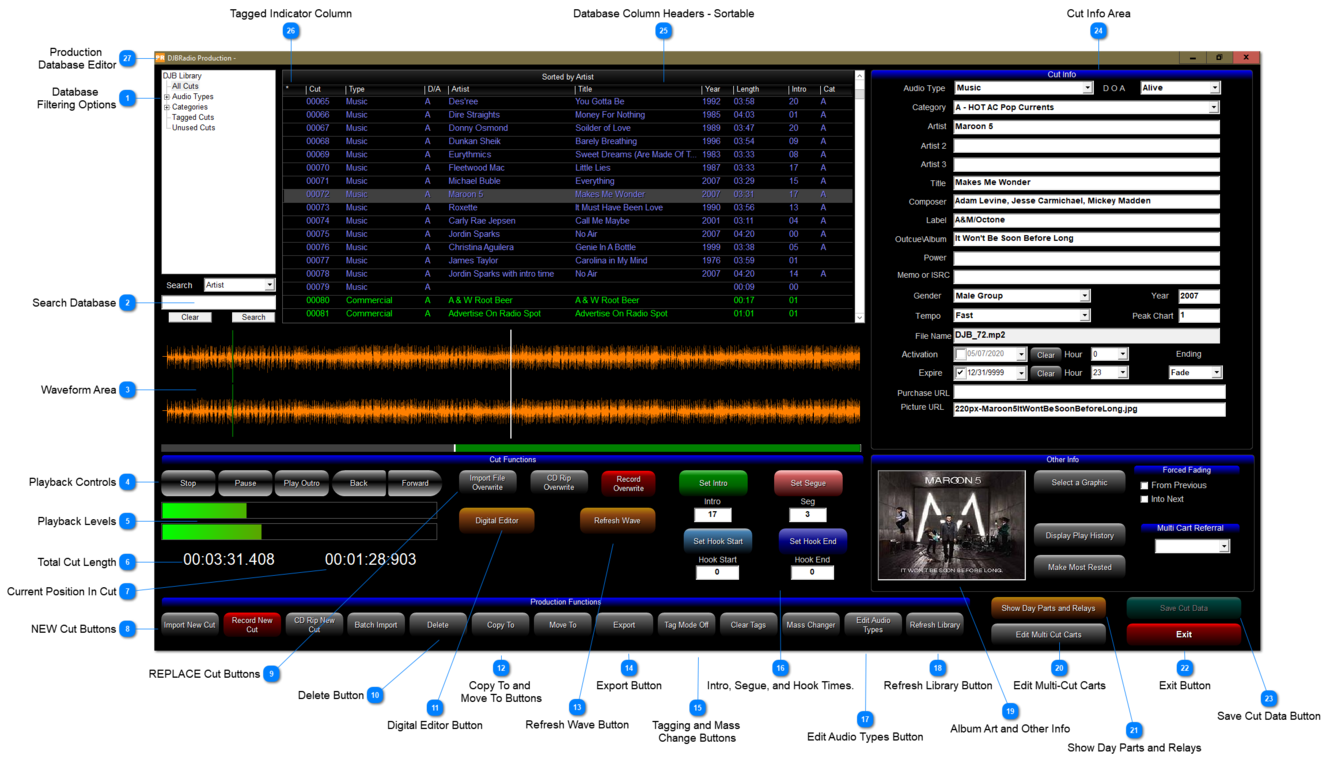
Database
Filtering Options Click to filter the library by Audio Type, Category, Tagged, or Unused (Available) cuts.
Click "All Cuts" to return to the default view.
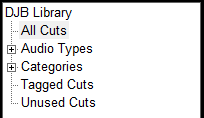
Search Database By changing the drop box you can search the library by Artist, Title, Length, Audio Type, Category, or Cut #.
Waveform Area This shows the waveform of the currently loaded cut. The white line is the current playback location in the waveform.
Also this shows the Intro marker (Green line). the Segue marker (Pink Line), and the Hook start (Light Blue) and end (Dark Blue) markers, if set.
The green bar at the bottom shows the remaining duration of the cut.
Playback Controls These buttons control the playback of the currently loaded audio cut.
Play Outro plays the last 25 seconds of a song to allow you to set the Segue.
Back and Forward jump the playback indicator 5 seconds in the appropriate direction.
Playback Levels These are the playback level meters.
Total Cut Length
Current Position In Cut
NEW Cut Buttons These buttons will CREATE A NEW CUT by importing from an audio file, recording from an audio source, or ripping from a CD.
Batch Import will import a group of audio files and give them sequential cut numbers starting from a number you choose.
REPLACE Cut Buttons These buttons will REPLACE AN EXISTING CUT by importing from an audio file, ripping from a CD, or recording from an audio source.
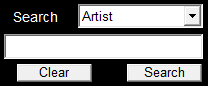
Delete Button This will permanently DELETE a cut from the database. There is no undo if you say "Yes" to the confirmation dialog.
Digital Editor Button This button opens the built-in digital editor for making edits to the cut.
Copy To and
Move To Buttons Copy To: Prompts you for a new number and creates a duplicate of the selected cut leaving you with 2 cuts that are identical except for the cut number.
Move To: Prompts you for a new number and creates a duplicate of the selected cut and then deletes the old number.
Refresh Wave Button This button forces a redrawing of the waveform in the Waveform Area
Export Button This button brings up an interface to export the cut to your hard drive and allows you to choose the output file type (WAV, MP3, etc.).
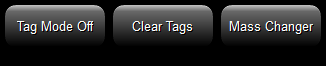
Tagging and Mass
Change Buttons The first button turns Tag Mode On/Off. When on, any cut you click on becomes tagged (indicated by an asterisk "*" in the 1st column)
The second button clears all tags from all cuts in the database.
The Mass Changer button allows you to change every tagged cut at once.
Allowed changes: Category, Active Status, Artist, Audio Type, Segue Time, Gender, Tempo, Dayparts, allows you to mass export files (with or without conversion), and allows mass deletion.
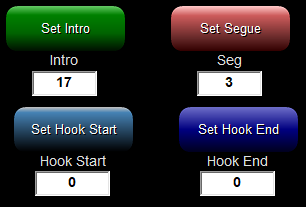
Intro, Segue, and Hook Times. Set Intro places the Intro mark over the current position of the playback indicator in the waveform. This Intro marker serves to let the live on air personality when the vocals begin.
Set segue places the Segue mark over the current position of the playback indicator in the waveform and tells DJB On Air to fire the next cut.
Set Hook Start and End allow you to mark up to 10 seconds of a cut as the "Hook" of the song, usually the most recognizable part.
NOTE: To use the 'PlayHooks' command to build dynamic Hook Promos on the fly, you must first set up the Hook Promo Settings in the DJB Radio On Air Settings program.
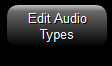
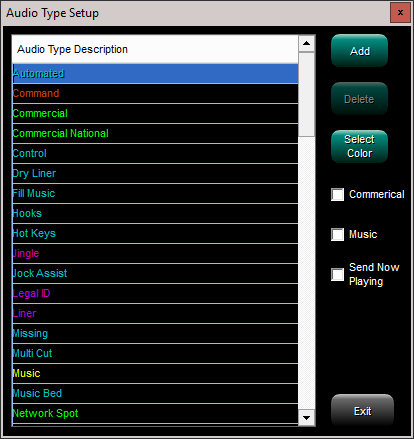
Edit Audio Types Button Opens the Edit Audio Types window below.
This allows you to mark which types are commercials, music, and also items you want sent to the Now Playing interface.
You can also change the colors of each type and add and delete custom types. You cannot delete the default types.
Refresh Library Button Click this to refresh the library window to see any changes you just made.
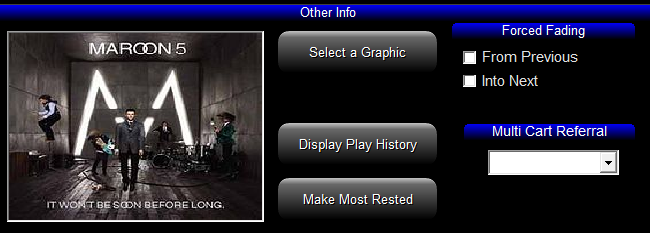
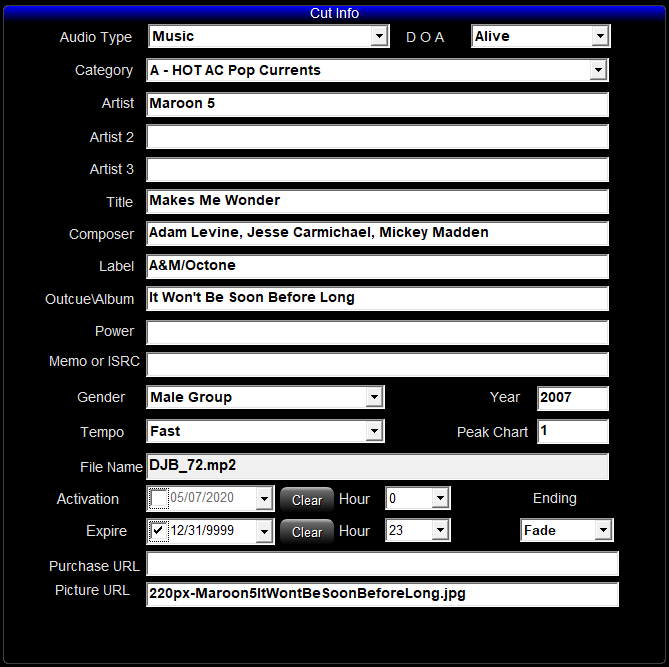
Album Art and Other Info Select a Graphic allows you to choose an album art from the JBCoverArt folder for your cut.
Display Play History looks at Scheduled Logs and shows the hours the cut was scheduled.
Make Most Rested sets an audio cut to "Most Rested" status causing it to schedule first in it's category on the next log.
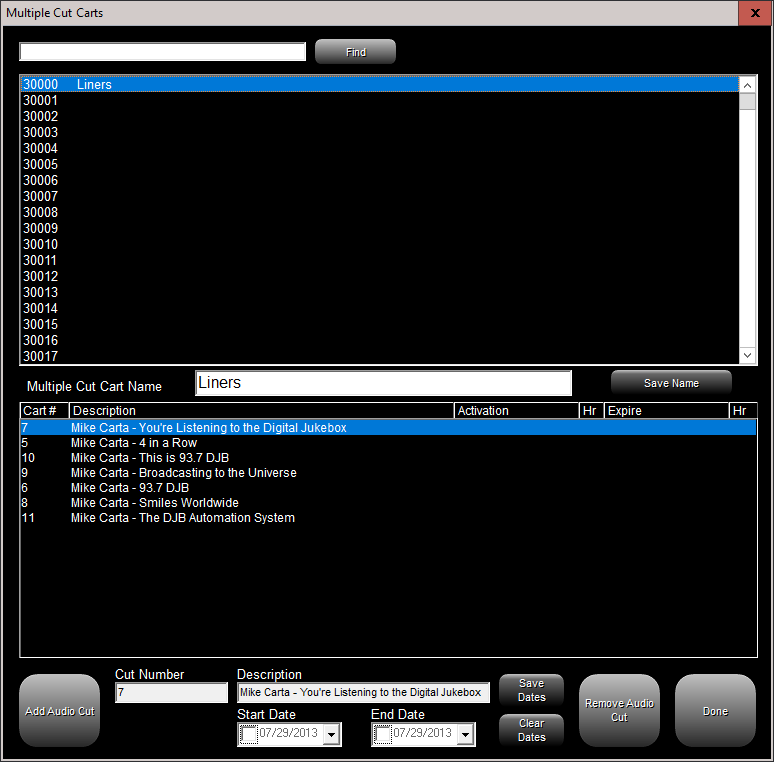
Edit Multi-Cut Carts Brings up the Multiple Cut Carts window where you can edit the Multi-Cut Carts by adding, deleting and reordering the cuts.
You can also put start and end date limits on the individual cuts.
Cuts will play in the order shown if the Multi-Cut Cart is scheduled multiple times and the order can be shuffled in DJB Scheduler.
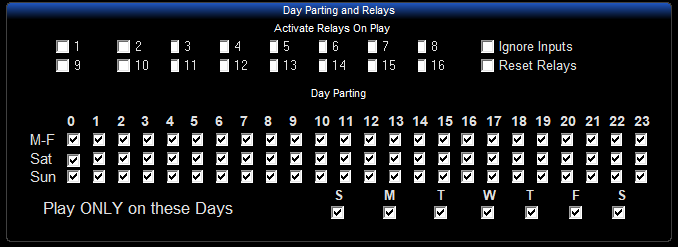
Show Day Parts and Relays Button changes to hide---->
Swaps the "Other Info" pane with the "Day Parting and Relays" pane.
This allows you to specify when a cut is allowed to air if you are using the day parting rules in the built-in scheduler.
Also allows you to configure an output relay to fire when the cut is aired.
(Click "Hide Day Parts and Relays" to return to the normal "Other Info" pane.)
Exit Button Click here to exit the DJB Radio Production Suite
Save Cut Data Button If you have made any changes to the cut, this button will light up indicating the need to save.
Click it to make sure you don't lose your changes.
Cut Info Area This set of fields contains all of the metadata for the currently selected cut.
Database Column Headers - Sortable You can click on these to sort the current view by the column you click on.
Tagged Indicator Column An asterisk "*" in this column indicates the cut has been tagged.
Production
Database Editor The Main Production Screen